By

Embarking on a full-scale property transformation is one of the most rewarding yet complex undertakings a homeowner can experience. Whether you have recently purchased an older home brimming with potential or you are finally ready to modernize the house you have lived in for decades, coordinating dozens of trades, permits, and design decisions requires a disciplined roadmap. Without a clear sequence of operations, even the most exciting remodeling vision can quickly spiral into costly rework, scheduling bottlenecks, and unnecessary stress.
The secret to a smooth remodel lies in respecting the natural order of construction. You must protect your belongings, stabilize hidden infrastructure, seal the exterior shell, expand your structural footprint, and only then move into interior finishes and backyard enhancements. By approaching your project phase by phase, you ensure that newly installed surfaces are never damaged by heavy demolition. Use this guide to organize your timeline, assemble the right team, and bring your vision to life from the ground up.
1. Establishing Your Vision, Budget, and Master Timeline

Before a single wall comes down or a dumpster arrives in your driveway, your most critical work happens on paper. Walk through every room of your home and document structural pain points, poor traffic flow, outdated utilities, and aesthetic goals. Defining the exact scope early prevents mid-project design changes, which are the single largest driver of budget overruns and schedule delays.
Build a realistic financial plan that accounts for hard construction costs alongside soft expenses like architectural drawings, municipal permits, and temporary housing. Set aside a dedicated contingency fund of 15 to 20 percent of your total construction budget so unexpected discoveries behind drywall never force you to compromise on quality.
-
Define Priorities: Separate essential structural repairs and functional layout fixes from purely cosmetic upgrades.
-
Gather Plans: Hire a residential architect early if your project involves moving load-bearing walls or altering rooflines.
-
Verify Permits: Confirm local zoning rules, historic restrictions, and required inspections before signing contractor agreements.
-
Sequence Lead Times: Work backward from your target completion date while accounting for custom cabinetry and specialty window delays.
2. Clearing the Space and Protecting Your Belongings
Renovation sites are dusty, noisy, high-traffic environments where heavy tools, lumber, and debris move constantly through hallways and doorways. Leaving valuable furniture, artwork, and electronics inside the work zone almost always leads to accidental scratches, moisture exposure, or pervasive drywall dust settling into upholstery. Clearing out the house gives contractors unobstructed access to floors, walls, and ceilings, speeding up daily labor.
To execute a clean sweep of the property without straining your back or risking damage to heirlooms, book experienced moving companies well ahead of your demolition start date. Professional crews can pack fragile items, disassemble bulky furniture, and transport your goods into climate-controlled storage until construction wraps up.
-
Declutter First: Donate, sell, or recycle clothing, outdated furniture, and kitchenware before packing begins.
-
Inventory Valuables: Photograph antiques and electronics and store serial numbers in a cloud folder before anything leaves.
-
Protect Remaining Surfaces: Cover non-renovated hardwood floors with heavy-duty rosin paper and breathable protective boards.
3. Addressing Hidden Water Damage and Structural Remediation
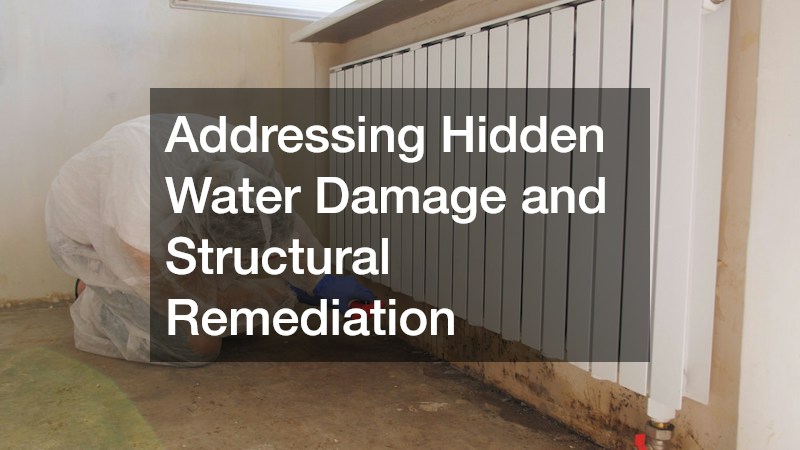
When demolition crews strip back dated paneling, old carpets, and tired drywall, they often uncover problems that were silently developing for years. Slow plumbing drips behind shower surrounds, outdated flashing around chimneys, or poor foundation drainage can leave behind rotted sill plates, compromised subfloors, and hidden fungal growth. Covering these issues with fresh sheetrock will ruin your new finishes and harm indoor air quality.
If tear-out reveals saturated framing, musty odors, or lingering water intrusion, pause cosmetic work and bring in certified restoration companies to remediate the affected areas. These specialists use moisture meters, thermal cameras, and industrial dehumidifiers to dry cavities completely, remove contaminated materials safely, and treat framing against future mold growth.
-
Inspect Framing: Check bottom plates, rim joists, and window headers for dark staining, soft wood fibers, or pest damage.
-
Verify Drying: Confirm wood moisture content returns to normal baseline levels before installing new insulation or drywall.
-
Upgrade Insulation: Install modern closed-cell spray foam or mineral wool in open cavities to boost thermal and moisture resistance.
4. Modernizing Underground Plumbing and Drainage Systems
Before pouring new basement slabs, tiling bathroom floors, or landscaping your yard, evaluate the condition of the pipes beneath your home. Houses built more than four decades ago often rely on aging cast iron, clay, or Orangeburg drain lines prone to corrosion, root intrusion, and offset joints. Traditional open-trench replacement requires jackhammering basement concrete and digging massive trenches across driveways and mature gardens.
Scheduling a video camera inspection early lets you evaluate trenchless sewer pipe lining as a minimally invasive way to restore structural integrity from the inside out. Technicians insert a flexible, resin-saturated tube into the existing pipe and cure it in place, creating a seamless, corrosion-resistant pipe within the old host line without excavating your yard.
-
Request a Sewer Scope: Run a fiber-optic camera from your main cleanout to the municipal connection to spot cracks or tree roots.
-
Replace Supply Lines: Swap out aging galvanized steel or polybutylene water pipes for modern PEX or copper manifolds while walls are open.
-
Upgrade Shut-Off Valves: Replace corroded gate valves with quarter-turn ball valves and consider adding a smart leak-detection shut-off device.
5. Fortifying the Roof and Exterior Building Envelope

Your home’s exterior shell serves as its primary shield against wind, rain, snow, and extreme temperature swings. Completing interior drywall, custom millwork, or hardwood flooring before your roof and siding are watertight puts your entire investment at risk from a single storm. Securing the building envelope early creates a dry, climate-stabilized interior environment so subsequent trades can work without weather delays.
Begin at the top by hiring a reputable roofing contractor to inspect your decking, flashing, ridge vents, and shingles or metal panels. Coordinating a roof replacement during a major remodel allows crews to integrate new skylight curbs, exhaust vents, and gutter systems seamlessly while scaffolding is already up.
-
Inspect Decking and Ventilation: Replace delaminated plywood sheathing and ensure balanced soffit intake and ridge exhaust vents.
-
Upgrade Flashing: Install fresh step flashing, counter-flashing, and pipe boots around chimneys, dormers, and plumbing vents.
-
Install Seamless Gutters: Size gutters for your roof pitch and extend downspouts at least six feet from the foundation.
6. Expanding Living Space with Structural Additions
Sometimes reconfiguring existing walls still leaves a growing family short on bedrooms, home office space, or a spacious kitchen-dining hub. Expanding your footprint outward or upward unlocks square footage tailored precisely to how you live, while boosting long-term property value. Because structural expansions require deep foundations, engineered framing tie-ins, and utility extensions, they must be tightly coordinated with your main schedule.
Partnering with an experienced home addition contractor ensures that your new wing blends organically with your existing architecture rather than looking like an afterthought. A skilled builder will match roof pitches, align exterior siding courses, balance HVAC load calculations, and integrate new electrical subpanels seamlessly.
-
Confirm Foundation Specs: Conduct soil tests if required so footings and frost walls support the new structure without settling.
-
Match Exterior Proportions: Align window header heights, eave overhangs, and exterior cladding textures with the original house.
-
Recalculate HVAC Loads: Perform a load calculation to verify whether your current heating and cooling equipment can handle the added volume.
7. Upgrading Basement Safety and Natural Light
Basements are often the most underutilized square footage in a property, frequently relegated to damp storage because they feel dark and boxed in. Transforming a lower level into a legal guest bedroom, media room, or bright home gym requires addressing both natural illumination and strict life-safety building codes.
Under modern residential building codes, any basement used as a habitable living area or sleeping room must feature a compliant emergency escape and rescue opening. Coordinating professional egress window replacements turns a cramped, subterranean room into an airy, code-compliant living space while flooding the lower level with daylight.
-
Verify Minimum Dimensions: Ensure at least 5.7 square feet of net clear opening, a 24-inch minimum height, and a sill no higher than 44 inches above the floor.
-
Integrate Drainage: Connect the bottom of the window well directly to your perimeter footing drain so heavy rain never pools against the glass.
-
Choose Efficient Glazing: Select double- or triple-pane low-E glass filled with argon gas to prevent winter basement drafts.
8. Designing Layered Illumination and Electrical Upgrades
Once framing, plumbing, and exterior openings are locked in, electricians wire the nervous system of your modernized home. Relying solely on a grid of harsh overhead recessed cans flattens room architecture and creates unflattering shadows, whereas a thoughtfully layered lighting plan brings warmth, depth, and task-specific functionality to every room.
Before drywall goes up, map out your furniture placement and visit a specialized lighting store to see fixtures in person, compare color temperatures, and build a cohesive fixture schedule. Selecting all fixtures, rough-in housings, and smart dimmers ahead of electrical rough-in prevents costly junction-box relocations after walls are painted.
-
Layer Lighting Types: Combine ambient chandeliers or flush mounts, focused task pendants or vanity lights, and accent sconces.
-
Standardize Color Temperature: Stick to warm white bulbs between 2700K and 3000K throughout living spaces so fixtures harmonize visually.
-
Future-Proof Electrical Capacity: Upgrade to a 200-amp main panel if adding induction ranges, heat pumps, or an electric vehicle charger.
9. Installing Interior Finishes and Custom Window Treatments
With drywall hung, taped, sanded, and primed, your renovation finally shifts from construction zone to recognizable home. Follow strict top-down sequencing to protect delicate surfaces: install cabinets and millwork first, followed by countertops, interior doors, trim carpentry, wall paint, and finally hardwood or tile flooring.
As painters wrap up final touch-ups and floor coverings are rolled away, turn your attention to privacy, glare control, and acoustic softening across your newly trimmed windows. Measuring and ordering custom blinds during the final finish phase guarantees an exact inside-mount fit that highlights your new window casing rather than hiding it behind bulky hardware.
-
Acclimate Hardwood Flooring: Let solid wood planks sit inside the climate-controlled house for five to seven days before installation.
-
Coordinate Hardware Finishes: Align door levers, cabinet pulls, faucets, and window hardware across two or three complementary metal tones.
-
Consider Motorized Shading: Wire low-voltage power or select rechargeable motorized shades for tall stairwell windows and wide sliders.
10. Transforming Your Yard into an Outdoor Oasis
Heavy equipment, lumber deliveries, and dumpsters inevitably take a toll on your lawn during a whole-home remodel. Saving exterior living upgrades for the final phase ensures that newly poured concrete, plantings, and outdoor structures are never damaged by construction trucks or falling debris.
Begin by defining distinct outdoor zones for cooking, dining, and lounging. Hiring an experienced deck company allows you to build a multi-level composite or hardwood platform directly off your kitchen or family room, complete with integrated step lighting and sleek railings. If your master plan includes aquatic recreation, coordinate early with local pool builders so excavation, utility trenching, and safety fencing integrate seamlessly with your patio hardscaping.
-
Align Floor Heights: Design deck framing so exterior decking sits just below your interior threshold for effortless indoor-outdoor flow.
-
Plan Outdoor Utilities Early: Run dedicated gas lines for grills and GFCI-protected electrical circuits before closing basement ceilings.
-
Complete Grading Last: Re-grade soil away from your foundation and lay fresh sod once all heavy backyard construction wraps up.
Completing a whole-home renovation is a major undertaking that rewards patience, thorough preparation, and disciplined sequencing. By moving methodically from initial planning and site protection through structural remediation, exterior fortification, interior craftsmanship, and outdoor living, you eliminate costly guesswork and empower every trade professional on your site to deliver top-tier results.
Before signing off on your final contractor payment or releasing the last holdback check, conduct a comprehensive blue-tape walkthrough room by room in bright natural daylight. Take your time testing every single window latch, sliding door track, cabinet drawer glide, light dimmer, HVAC zone, plumbing fixture, and GFCI outlet to ensure flawless operation across the board. At the same time, compile a dedicated homeowner master binder—both physical and digital—containing all product warranties, custom paint formulas, stain codes, appliance manuals, lien waivers, and final municipal permit sign-offs so future maintenance is effortless. With the heavy lifting finally behind you and every system modernized from the roof down to the foundation, you are ready to move back in, unpack at your own pace, and enjoy a safer, more efficient, and deeply personalized home for decades to come.